There are dozens of odd jobs available in San Andreas. Some are required for 100% completion and some are not. In this guide you can learn where to find them, how to activate them and of course, the best way to defeat them.
Paramedic
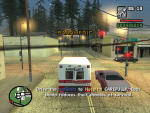
Get into an Ambulance at Angel Pine. If you can't find one at Angel Pine get one at San Fierro and drive it to Angel Pine. You can do these paramedic missions wherever you like, but Angel Pine is the most sensible choice as it is small, remote and easy to get around whereas (for example) San Fierro has steep slopes and lots of traffic.
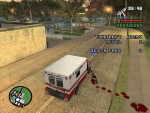
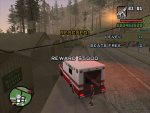
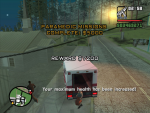
Once you are inside an Ambulance, toggle the paramedic missions. Various statistics are shown on-screen, and an injured patient is represented on the radar by a blue blip. Goto the injured patient and stop beside him/her. Make sure that either the passenger door or the back door of the ambulance is right beside the patient, so as to reduce time loss - This is particularly effective when the patient is elderly, because they walk very slowly. As soon as the patient starts entering the vehicle, speed off towards the hospital - You don't have to wait until the patient is securely in the vehicle before driving. Stop in the red marker to rescue the patient. Your reward is then shown on-screen, and you need not worry about the patient any longer, so feel free to reverse over him/her. Now Level 2 begins, and you must save 2 patients this time. Use exactly the same procedure to save the patients. For Level 3 you will have to save 3 patients, and for Level 4 you will have to save 4 patients, and so on. Your Ambulance can hold a maximum of 3 patients, so you may need to collect 3 patients, drop them at the clinic and then go back for the rest. Each time you rescue a patient, bonus time is rewarded. Complete upto and including Level 12 to have your maximum health increased.
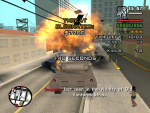
Firefighter
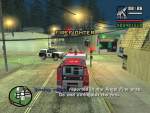
Similar to the Paramedic missions, Angel Pine is the most suitable choice of location because of it's size and remoteness. Grab a Firetruck and trigger the Firegihter missions.
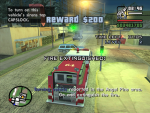
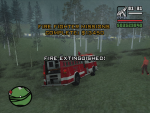
A burning vehicle is reperesented on the radar by a blue blip. Goto the burning vehicle and extinguish the fire. Use the controls to alter the direction of the extinguisher, and keep it focused on the fire. A cash reward is recieved for each case you attend to. As the levels progress, more vehicles require attention and the pedestrians that occupy the vehicles also need extinguishing. When you target a pedestrian with the extinguisher, they will get thrown across the ground because of the force of the water. It is important that you keep the extinguisher focused on the patient at all times otherwise he/she will remain on fire. Complete upto and including Level 12 to obtain "fire proof" mode.
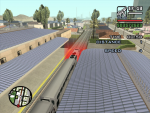
Freight
Get inside a train and trigger the Freight missions. There are two missions to complete, both of which are exactly the same.
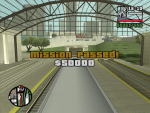
As soon as the timer starts, begin accelerating towards ~45MPH. Do not exceed 45MPH or you risk de-railing the train. The distance meter determines what distance of your journey remains. Start decelerating rapidly when it gets to approximately 300. Approach the red marker at ~15MPH and make sure the front carriage of the train is within the marker. A cash reward is recieved and bonus time may be given. Follow the same procedure and head towards the next station. When you finally reach the station that you originally started at, mission 1 is complete. Do exactly the same for mission 2 and recieve a $50,000 reward. You can replay the Freight missions at any time to make extra cash.
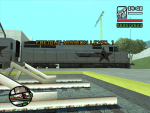
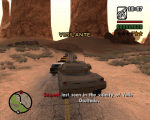
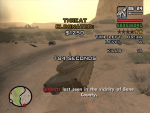
Vigilante
You need a police/military vehicle to trigger the Vigilante missions. You can choose between the Hunter, Hydra, Police Bike, FBI Rancher, Police Car, Police Van or the Rhino. If you're comfortable flying, then Hydra is the best choice. If not, grab a Rhino. You can steal a Rhino from the Area 69 compound in Bone County.
Trigger the Vigilante missions in the desert (lots of space, easy to get around, etc.) and the suspects are shown on the radar as a red blip. Point the turret behind you and shoot missiles in rapid succession to gain speed. When you are close to the suspects, position the turret and blow up the suspect's vehicle. A cash reward is given for every level you complete, and bonus time may be rewarded. Complete upto and including Level 12 to have your maximum armor increased to 150%.
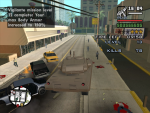
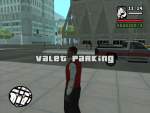
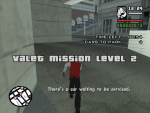
Valet Parking
The Valet missions are unlocked after completing 555 WE TIP. Change into the Valet costume and walk into the red marker to trigger the missions.
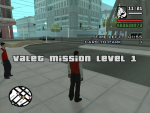
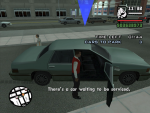
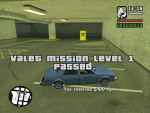
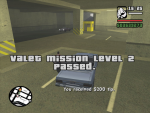
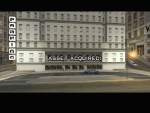
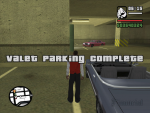
Wait on the small sidewalk opposite the building. This way you have a better chance of getting to the vehicle before the other valet's. There are 5 levels to complete and for each level you have a 2 minute time limit. For level 1 you must park 3 cars, for Level 2 you must park 4 cars, for Level 3 it's 5 cars, and so on. Each time a car is successfully parked, bonus time may be rewarded. Park each car perfectly within the lines to ensure a greater tip. Then hurry back to the front of the building and attend the next customer. Complete upto and including Level 5 to aquire the Valet Parking asset, which now generates a maximum of $2000, so be sure to collect it regularly.
Exports & Imports
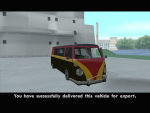
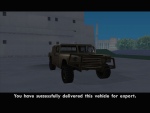
After completing Customs Fast Track (main story mission) vehicle Exporting and Importing is unlocked at the car crane on the docks in the Easter Basin Docks in San Fierro. Each time you enter a vehicle that is on the Export list, a text message sends a reminder that the current vehicle CJ's driving can be exported. When this happens, save the car in one of the safe house garages.
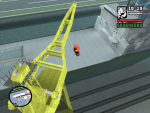
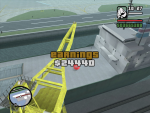
A list of vehicles for exporting is written on the large chalkboard near the crane. To acquire a vehicle that is on the export list, drive it to the docks and then, using the crane, place it on the ship. Upon completion, the vehicle is removed from the list and a cash reward is given. The export list comprises of 10 cars. 10 more cars will appear after the first 10 cars are delivered with a total of 30 cars to export. After collecting all of the vehicles on the list, a bonus reward of $215,000 is given (Hint: Certain cars are only available on certain days of the week).
In order to move vehicles on and off the ship, use the magnetic crane lift on the loading dock. Park a stolen car on the dock and enter the red marker under the car crane and press the Triangle button. Tilt the Left Analog stick to the left and right to rotate the crane on axis. Tilt the Left Analog stick up and down to move the crane along the track below. Use the Square button to raise the magnet and the Circle button to release the vehicle from the magnet.
| Board |
Car |
Reward |
| 1 | Patriot | $40,000 | | 1 | Infernus | $95,000 | | 2 | Cheetah | $105,000 | | 2 | Comet | $135,000 | | 3 | Super GT | $105,000 |
|
 |
Search News
|
 |
|
|